In my last article, I covered how and why to start a science blog. Now it’s time to get into the nuts and bolts: setting up your web site through WordPress. The wonderful thing about this is that there’s no real technical skill required — you don’t need to know HTML or buy any expensive web design software — everything is point-and-click.
Set Up Your Hosting and Domain Name
As I mentioned before, if you’re serious about getting into blogging you should host your own site (meaning you have your own domain name, instead of myblog.wordpress.com). And I recommended getting a hosting package and domain through GoDaddy simply because:
- The prices are competitive. It’s usually something like $3-5 per month for unlimited bandwidth.
- Their administration panel is easy to use. You log in and can set everything up with a few clicks.
- I host multiple web sites with them, and thus I’m quite familiar with the setup.
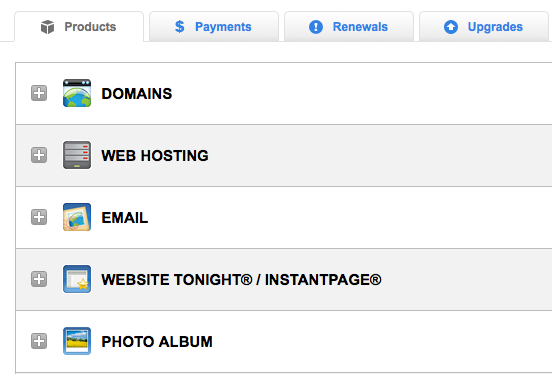
Please, for the love of God, get one of the Linux hosting packages (not Windows). Once you’re set up on GoDaddy, you log into the control panel which looks something like this:
Here, you’ll manage your domain, e-mail, and web site. Under the “Web Hosting” menu, find your web site and click “Launch” to bring up its control panel.
Install WordPress to Manage Your Site
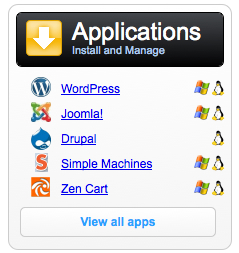
We live in a golden age of web publishing, because there are great content management systems (CMSs) that do almost everything for you. WordPress is the most widely-used of these. GoDaddy’s servers can install it automatically for you. On your web site’s control panel, find the “Applications” section and click on it. You’ll see something like this:
Install WordPress in your root directory (/). You’ll be prompted for a username and password, then it begins processing. This will take a few minutes, and you’ll get an e-mail when it’s done. Congratulations! You now have a web site.
Configure WordPress
The next few steps are really important. WordPress is great, but it needs a little customization so that you don’t look like the complete rookie that you are by having a site named “My Web Site”.
- Change the General Settings. Under Settings > General Settings, you’ll see where you can give your website or blog a name (the name of your website) and a “Tagline” (a brief sentence of what your blog is about). For example, you might have a site named “Fashion Diva” with the tagline “Fashion tips and advice for women”. You’ll also put in your e-mail address so that WordPress can notify you of comments on your site and such.
- Change your website’s link structure. Go to Settings > Permalinks. Under common settings, change the radio button to “Post name”. Save this setting. Now, your posts won’t be categorized under yourdomain.com/year/month/date/first-post. Instead, they’ll be at yourdomain.com/first-post. Search engines like this, and it also makes your web site easier to bookmark and navigate.
- Remove the clutter. Go to Appearance > Widgets. In the middle of the page are all of the available “Widgets” that you can put in your sidebar. These are little display items, like the “Tag Cloud”. Most of the time, all they do is distract visitors. So you should remove most of these from the sidebar. Maybe just start with Recent Posts, Categories, and Meta (which has your login link and RSS feeds for visitors).
Customize Your Theme and Appearance
Last but not least, you should customize your site’s look and feel. The principal way that you do this is by selecting a theme. There are many great free themes out there for WordPress; I personally like Suffusion because it’s incredibly versatile and well-supported. You customize your fonts, color scheme, and header image. Experiment with these elements until you find a look that you like. Graphic and site design isn’t my core area of expertise, so I’ll leave that area for others. In my next post I’ll discuss how to begin networking with other bloggers and building your profile in the online world.

